


Premise
Recently, Twelve Labs was featured as a pioneer in multimodal AI at GTC 2023. While watching the GTC 2023 video, I observed our co-founder, Soyoung, pulling her hair out finding the segment where our company was featured. This experience motivated me to tackle the challenge of searching within videos using our very own APIs. So, here we are with my fun-filled weekend project's tutorial, where I'll guide you through the process of finding specific moments in your videos using the Twelve Labs' search API.
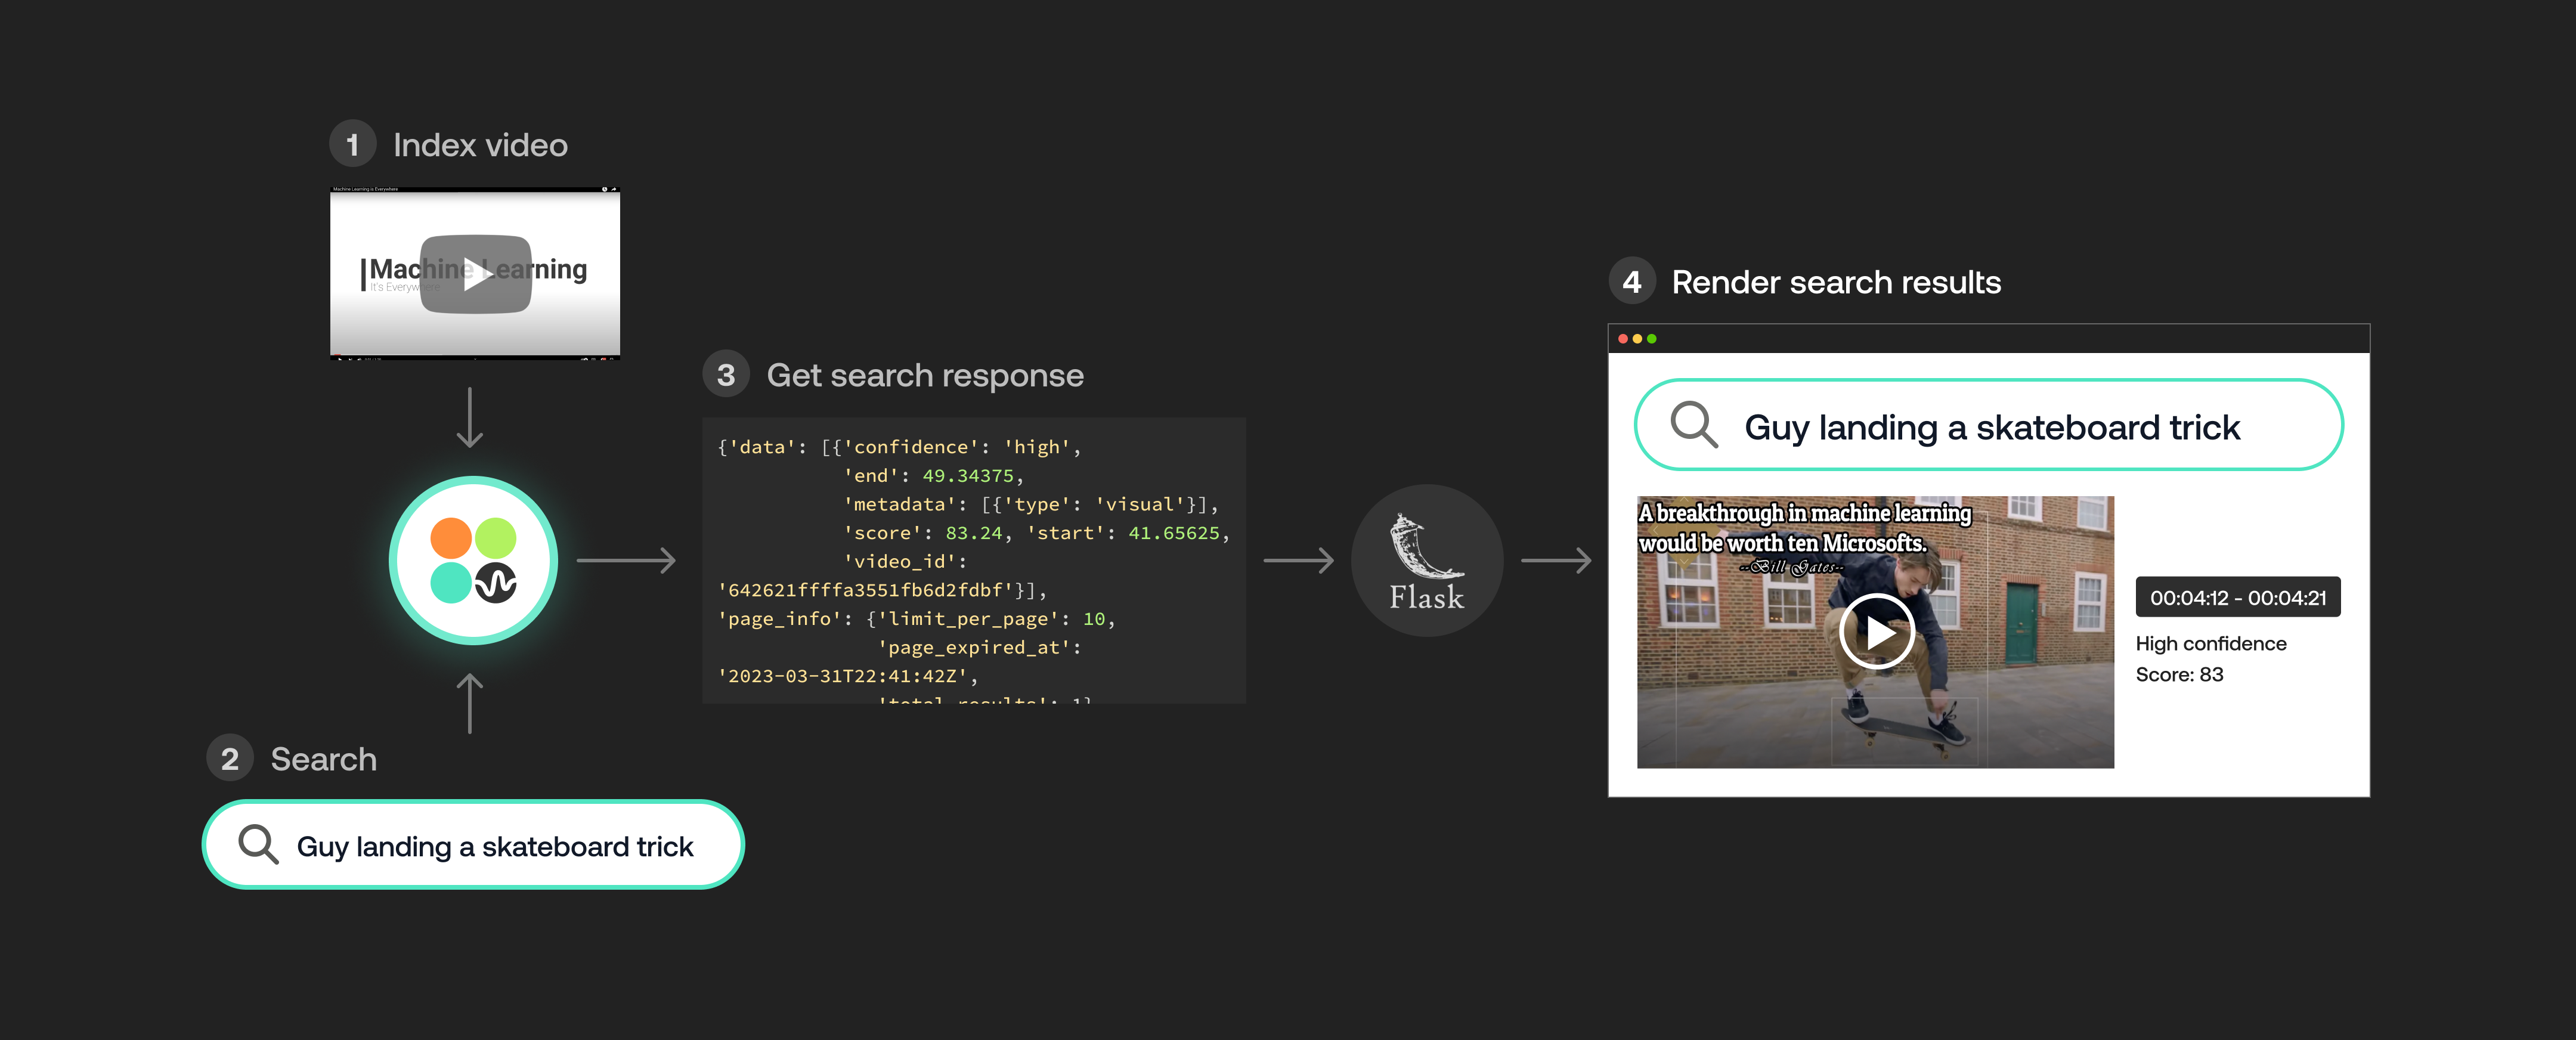
A simple blueprint to make searching within videos better😎
Introduction
Twelve Labs provides a multimodal foundation model in the form of a suite of APIs, designed to assist you in creating applications that leverage the power of video understanding. In this blog post, we'll explore how you can use the Twelve Labs API to seamlessly find specific moments of interest in your video with natural language queries. I'll upload an entertaining video from my local drive, which I put together during my graduate school days, titled "Machine Learning is Everywhere." True to its name, this 80-second video illustrates the ubiquity of ML in all aspects of life. The video highlights ML applications, such as a professional ping pong player competing against a Kuka robot, a guy performing a skateboard trick with ML being used for summarizing the event, and more. With the help of Twelve Labs API, I'll demo how you could find a specific scene within a video using simple natural language queries.
In this tutorial, I aim to provide a gentle introduction to the simple search API, so I've kept it minimalistic by focusing on searching for moments within a single video and creating a demo app using the lightweight and user-friendly Flask framework. However, the platform is more than capable of scaling to accommodate uploading hundreds or even thousands of videos and finding specific moments within them. Let's dive in and gear up for some serious fun!
Quick overview
- Prerequisites: Sign up to use Twelve Labs API suite and install the necessary packages to create the demo application
- Video Upload: Got some awesome videos? Send them over to the Twelve Labs platform, and watch how it efficiently indexes them, making your search experience a breeze!
- Semantic Video Search: Hunt for those memorable moments in your videos with simple natural language queries
- Crafting a Demo App: Craft a nifty python script that uses Flask to render your HTML template and then design a sleek HTML page to display your search results
💡 By the way, if you're reading this post and you're not a developer, fear not! I've included a link to a ready-made Jupyter Notebook, allowing you to run the entire process and obtain the results. Additionally, check out our Playground to experience the power of semantic video search without writing a single line of code. Reach out to me if you need free credits😄.
Prerequisites
In this tutorial, we'll be using a Jupyter Notebook. I'm assuming you've already set up Jupyter, Python, and Pip on your local computer. If you run into any issues, please come and holla at me for help on our Discord server, where we have quickest response times 🚅🏎️⚡️. If Discord isn't your thing, you can also reach out to me via email. After creating a Twelve Labs account, you can access the API Dashboard and obtain your API key. This demo will use an existing account. To make API calls, simply use your secret key and specify the API URL. Additionally, you can use environment variables to pass configuration details to your application:
Installing the dependencies:
Video upload
In our first step, I will show you how I uploaded a video from my local computer to the Twelve Labs platform to leverage its video understanding capabilities.
Imports:
Retrieve the URL of the API and my API key as follows:
Index API
The next step involves using the Index API to create a video index. A video index is a way to group one or more videos together and set some common search properties, thereby allowing you to perform semantic searches on the videos uploaded to the index.
An index is defined by the following fields:
Creating an index:
Task API to upload a video
The Twelve Labs platform offers a Task API to upload videos into the created index and monitor the status of the upload process:
Once you upload a video, the system automatically initiates video indexing process. Twelve Labs discuss the concept of "video indexing" in relation to using a multimodal foundation model to incorporate temporal context and extract information such as movements, objects, sounds, text on screen, and speech from your videos, generating powerful video embeddings. This subsequently allow you to find specific moments within your videos using everyday language or to categorize video segments based on provided labels and prompts.
Monitoring the video indexing process:
Creating another environment variables to pass the unique identifier of the existing index for our app:
Here's a list of all the videos in the index. For now, we've only indexed one video to keep things simple, but you can upload up to 10 hours of video content using our free credits:
Semantic video search, aka finding specific moments
Once the system completes indexing the video and generating video embeddings, you can leverage them to find specific moments using the search API. This API identifies the exact start-end time codes in relevant videos that correspond to the semantic meaning of the query you enter. Depending on the indexing options you selected, you'll have a subset of the same options to choose from for your semantic video search. For instance, if you enabled all the options for the index, you'll have the ability to search: audio-visually; for conversations; and for any text appearing within the videos. The reason for providing the same set of options at both the index and search levels is to offer you the flexibility to decide how you'd like to utilize the platform for analyzing your video content and how you'd want to search across your video content using a combination of options you find suitable for your current context.
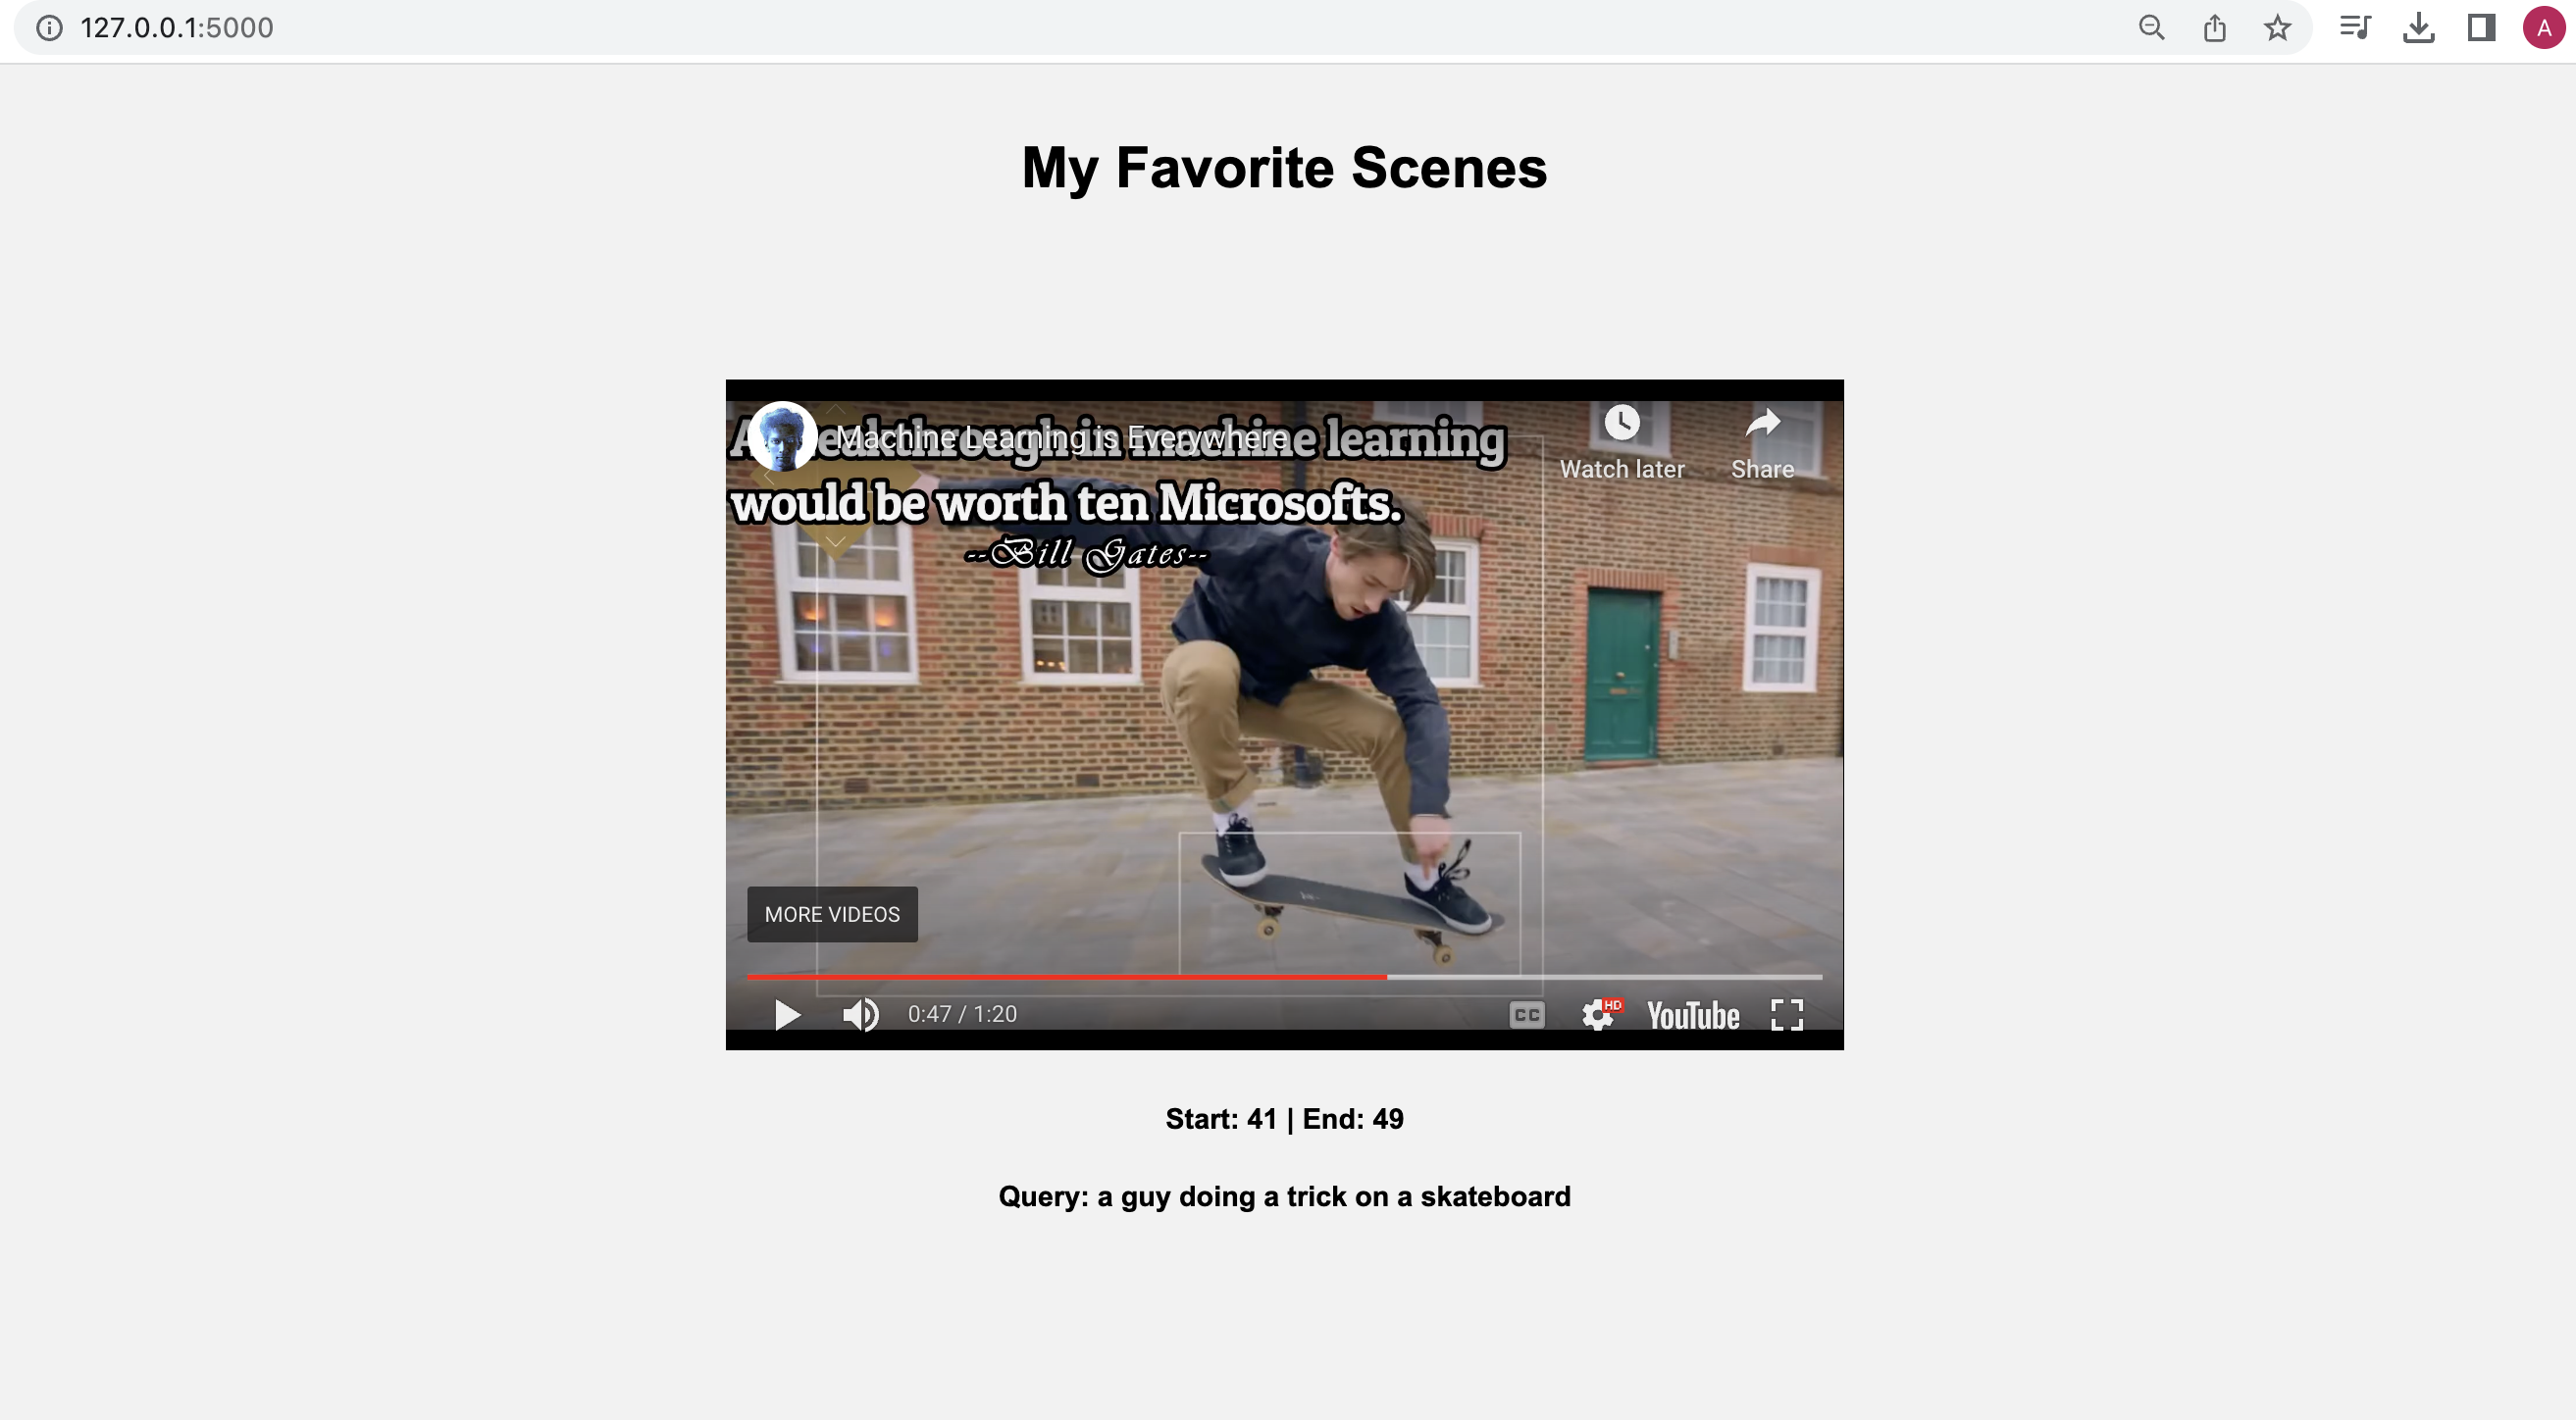
Let’s start with a visual search using a simple natural language query, “a guy doing a trick on a skateboard”:
Corresponding video segment:
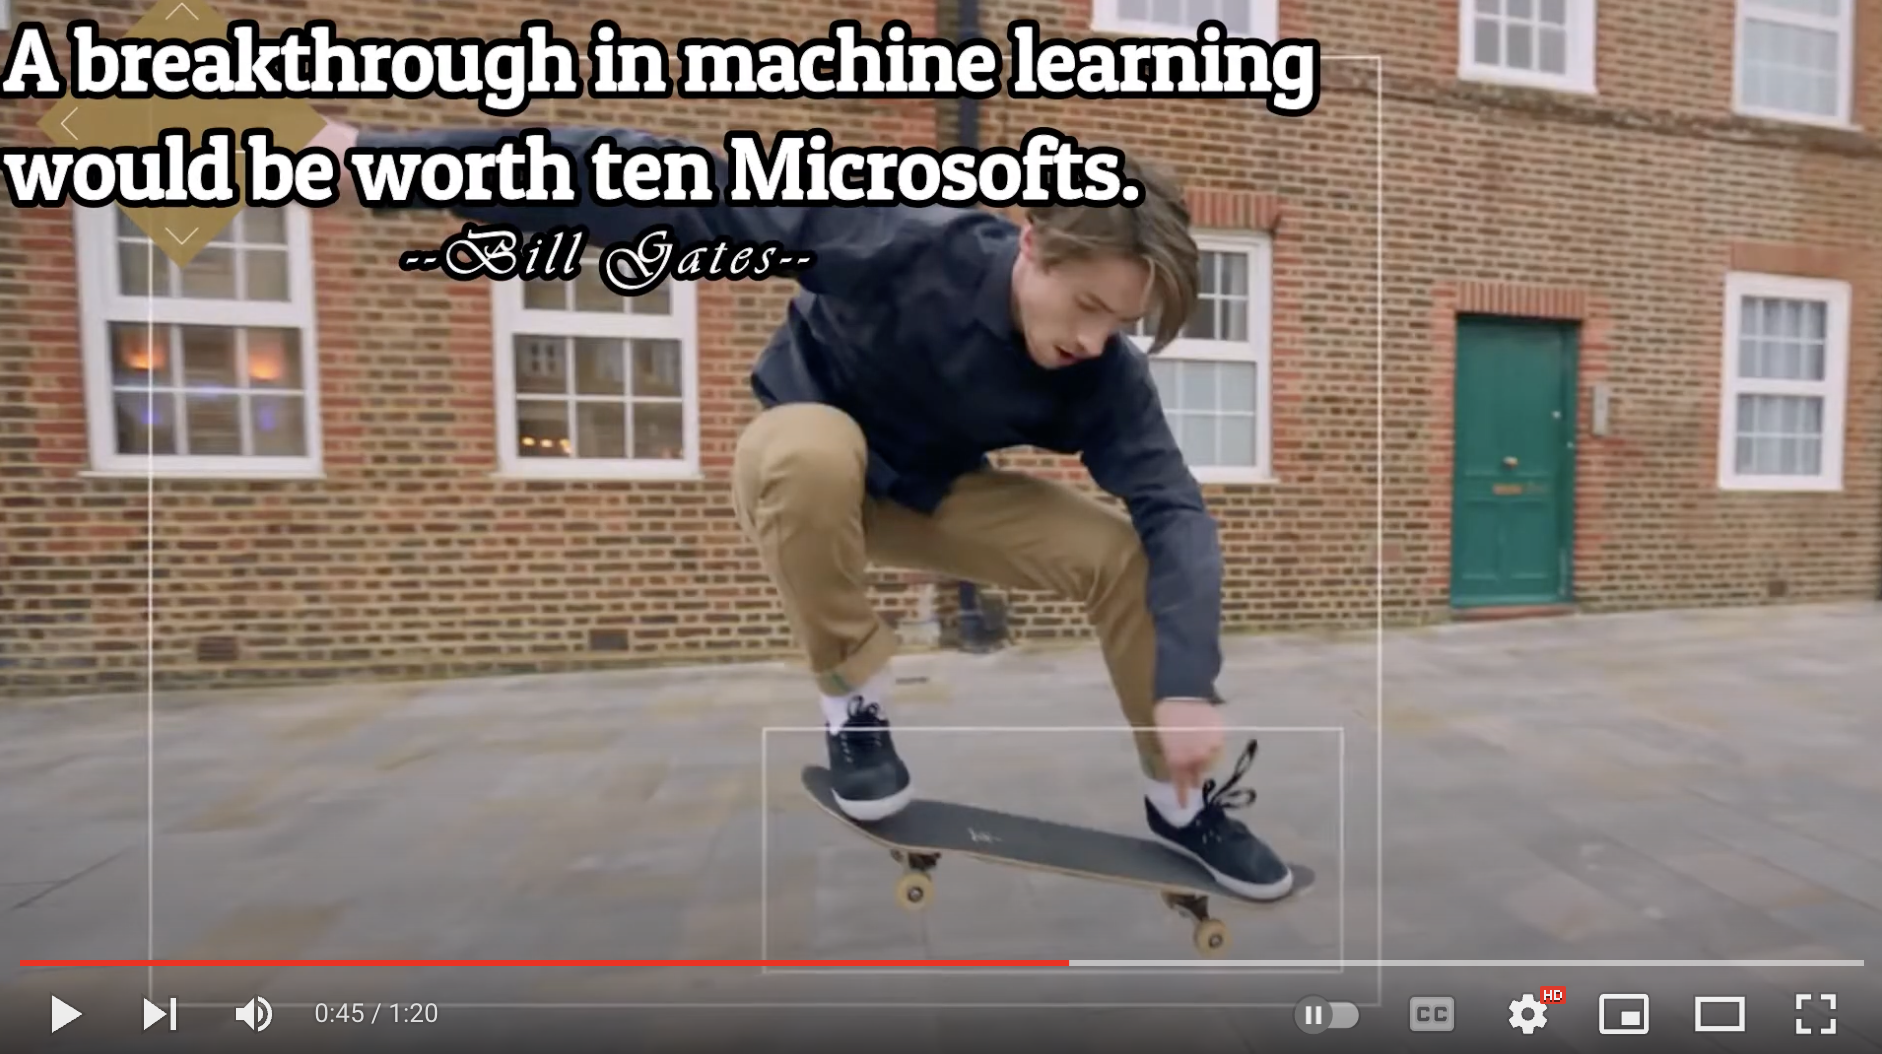
This part gets me super pumped because it showcases the model's human-like understanding of the video content. As you can see in the above screenshot, the system nails it by pinpointing the exact moment I wanted to extract.
Let's give another query a shot, "a guy playing table tennis with a robotic arm" and witness the system work its magic once more:
Output:
Corresponding video segments:
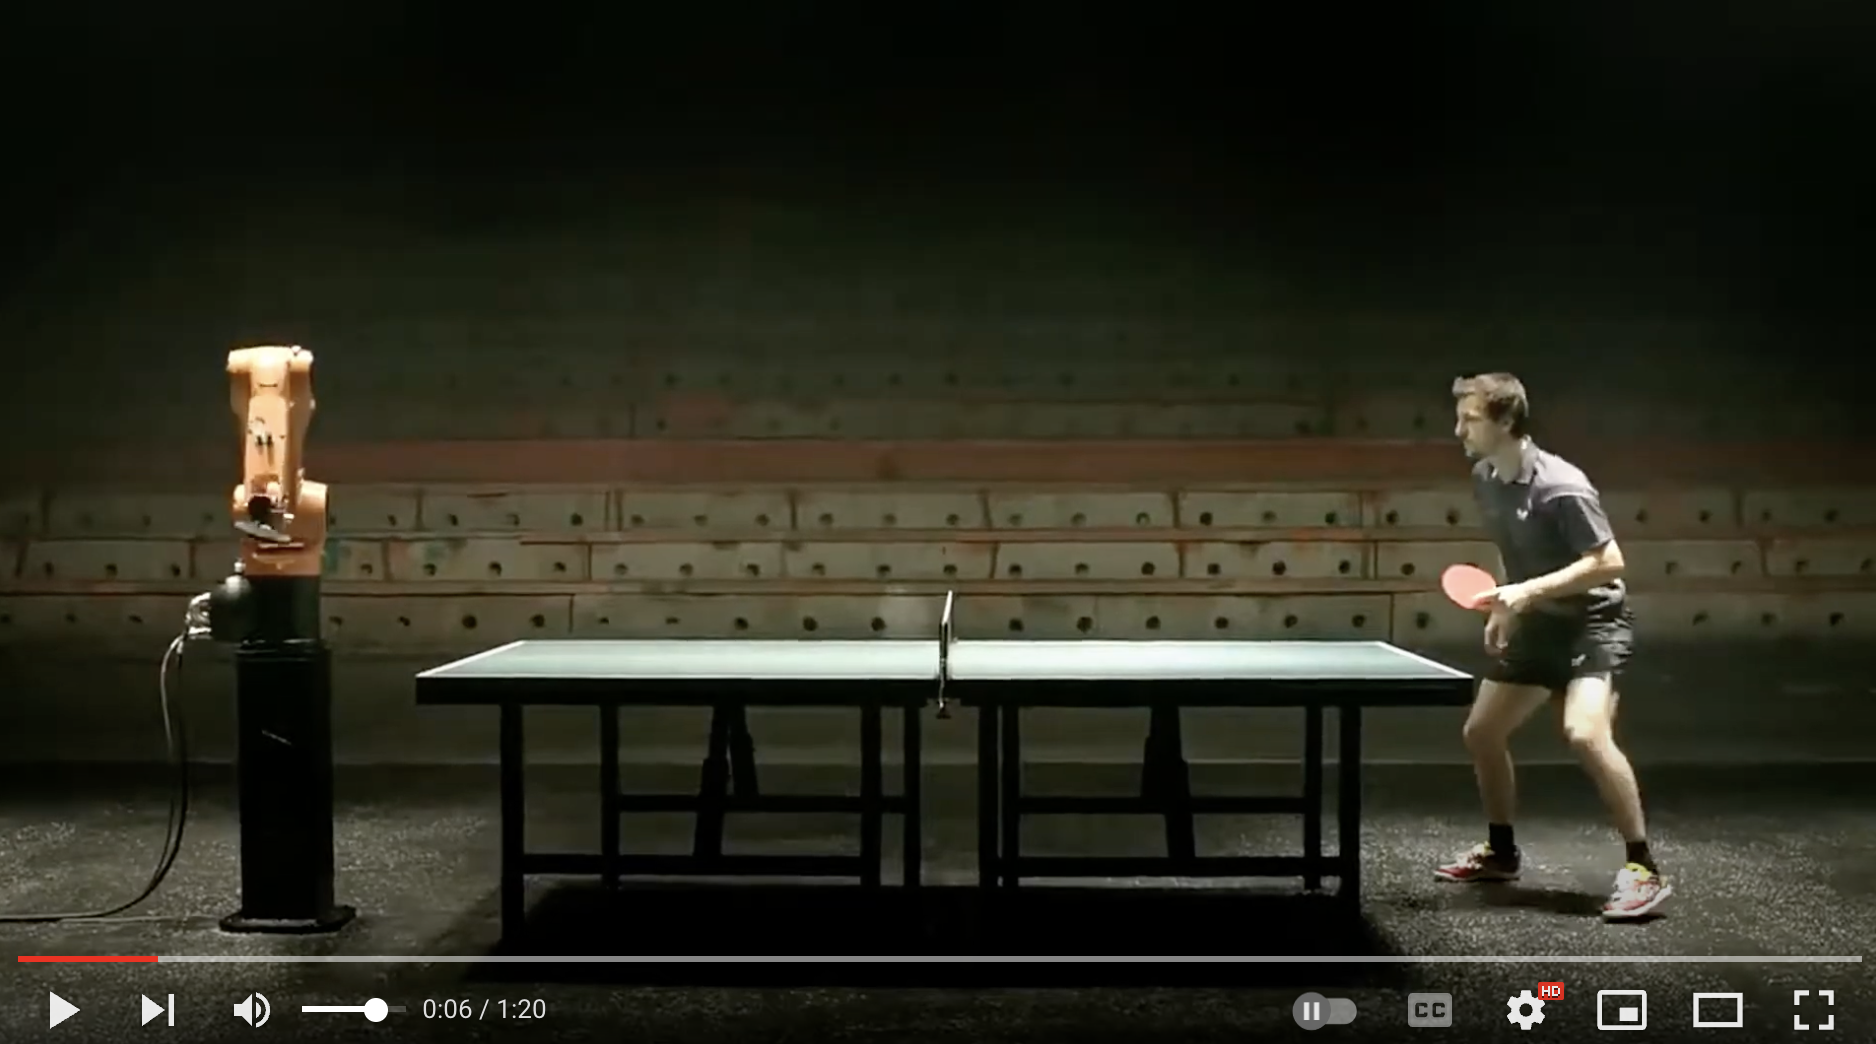

Bingo! Once again, the system pinpointed those fascinating moments spot-on.
💡Here's a fun little task for you: search for "a breakthrough in machine learning would be worth ten Microsofts" and set the search option to: ["text_in_video"].
In order to make the most of these JSON responses without manually checking the start and end points, we need a stunning index page crafted with love. That way, we can send the search request's JSON output straight to the corresponding video. Let's get to it!
Crafting a demo app
Kudos for sticking with me on this awesome video understanding adventure 🎉🥳👏! We've reached the final step where we'll craft a Flask-based, straightforward app that takes the search results from our previous steps and presents them on a beautiful web page, showcasing the exact moments we requested. By the way, I chose Flask since I come from a data science background and I love Python. Moreover, Flask is a lightweight Python-based framework that aligns with my needs for this tutorial. However, you're welcome to select any framework that caters to your preferences and requirements.
First step is to have the necessary imports on our Jupyter Notebook:
We'll be generating two lists - "starts" and "ends" - that hold all the starting and ending timestamps gathered from the search API:
Now that I've got the required timestamps and the same videos uploaded on my YouTube channel, there are a couple of ways to use them. I could either grab the video from my local disk and display my favorite clips on the web page, or I could simply use the video URL from my YouTube channel to achieve the same result. I find the latter more appealing, so I'll use the YouTube embed code for the same video I uploaded and pass the start and end timestamps to it. This way, the exact video segments I searched for will be displayed. Just a minor heads up – the YouTube embed code only supports integer values for the start and end parameters, so we'll need to round these values:
Let's quickly pickle these lists along with the query we entered. This will be useful when we pass them to the Flask app file we're preparing to create:
Voilà! We're all set to work with Flask and pass these parameters.
Steps to create Flask app
1. Create a new Flask project: create a new directory for the project and create a new Python file that will serve as the main file for your Flask app.
Once we have the Flask app file and the template ready, the directory structure will look like this:
Keep the video file you will upload within the my_flask_app directory.
2. Write the Flask app code: In the app.py file, we need to write the code for our Flask app. Here is the Flask app that uses Jinja2 templates and renders the 'index.html' file where our lists of timestamps are being utilized:
3. Create a templates directory: To use Jinja2 templates with Flask, we need to create a templates directory in the same directory as our Flask app. In this directory, we will store your Jinja2 templates:
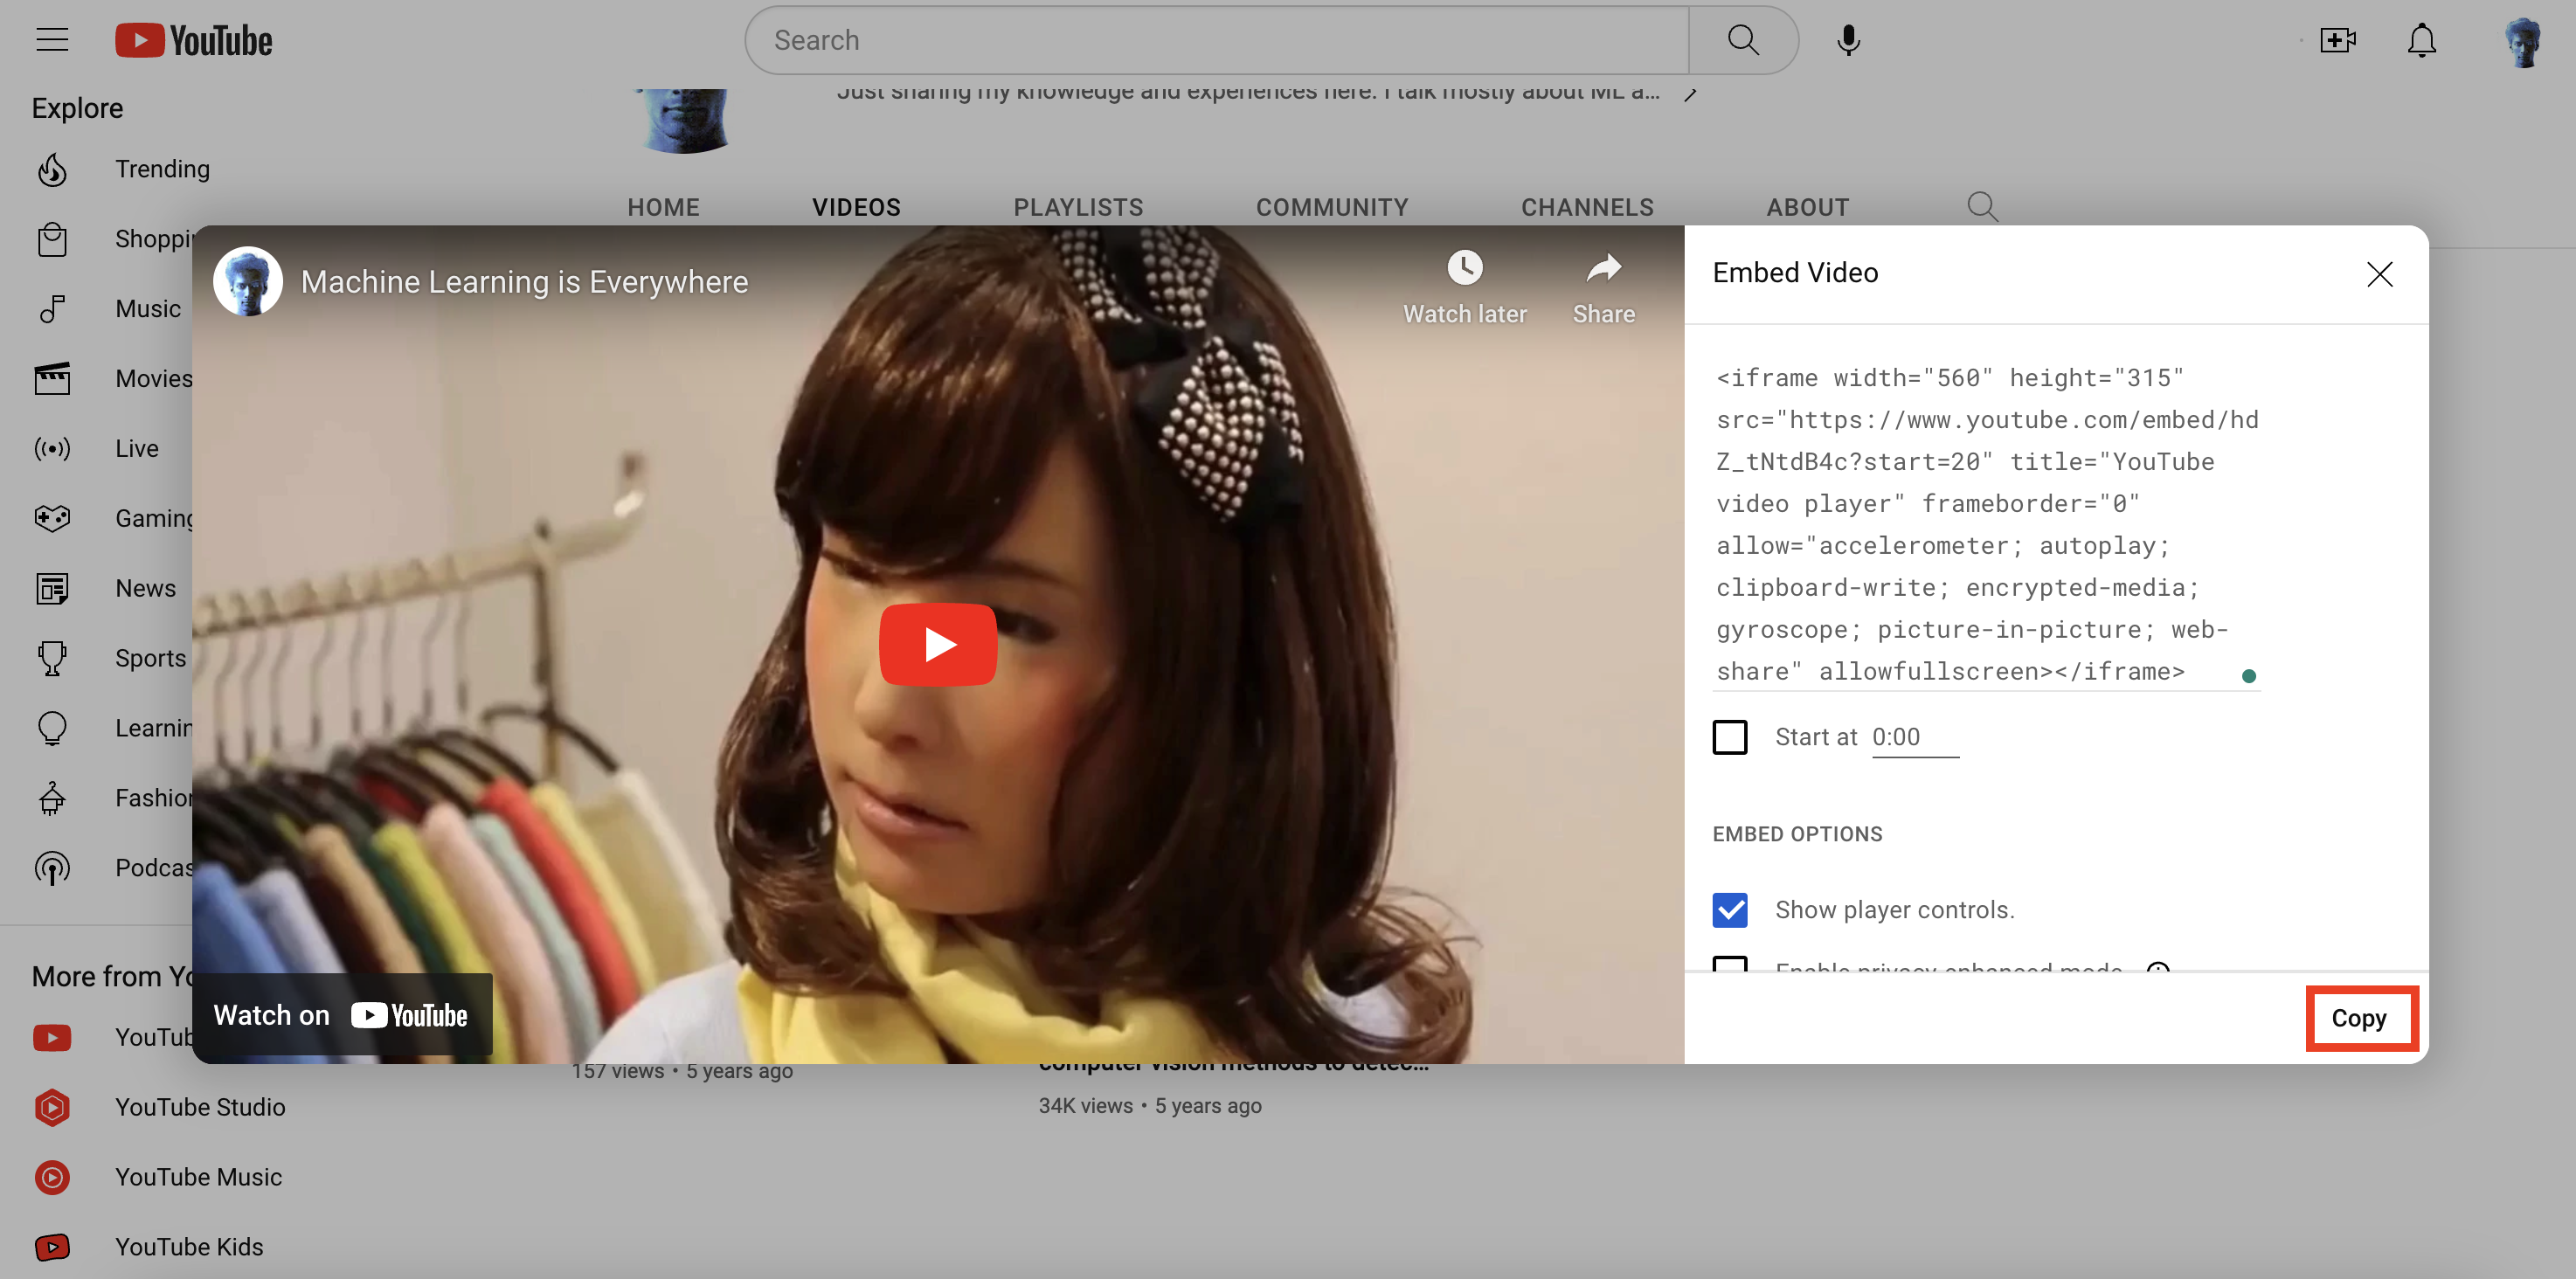
The final piece of the puzzle is the index.html page that will display all the video segments that matched the search query. Before we work on the HTML file, let’s quickly grab the Embed Video code from my YouTube channel:
4. Create a Jinja2 template: To create a Jinja2 template, we need to create an HTML file in the templates directory:
Here is a simple example of a Jinja2 template. It incorporate the code within the HTML file that lets us iterate through the lists and the query string we passed from the app file:
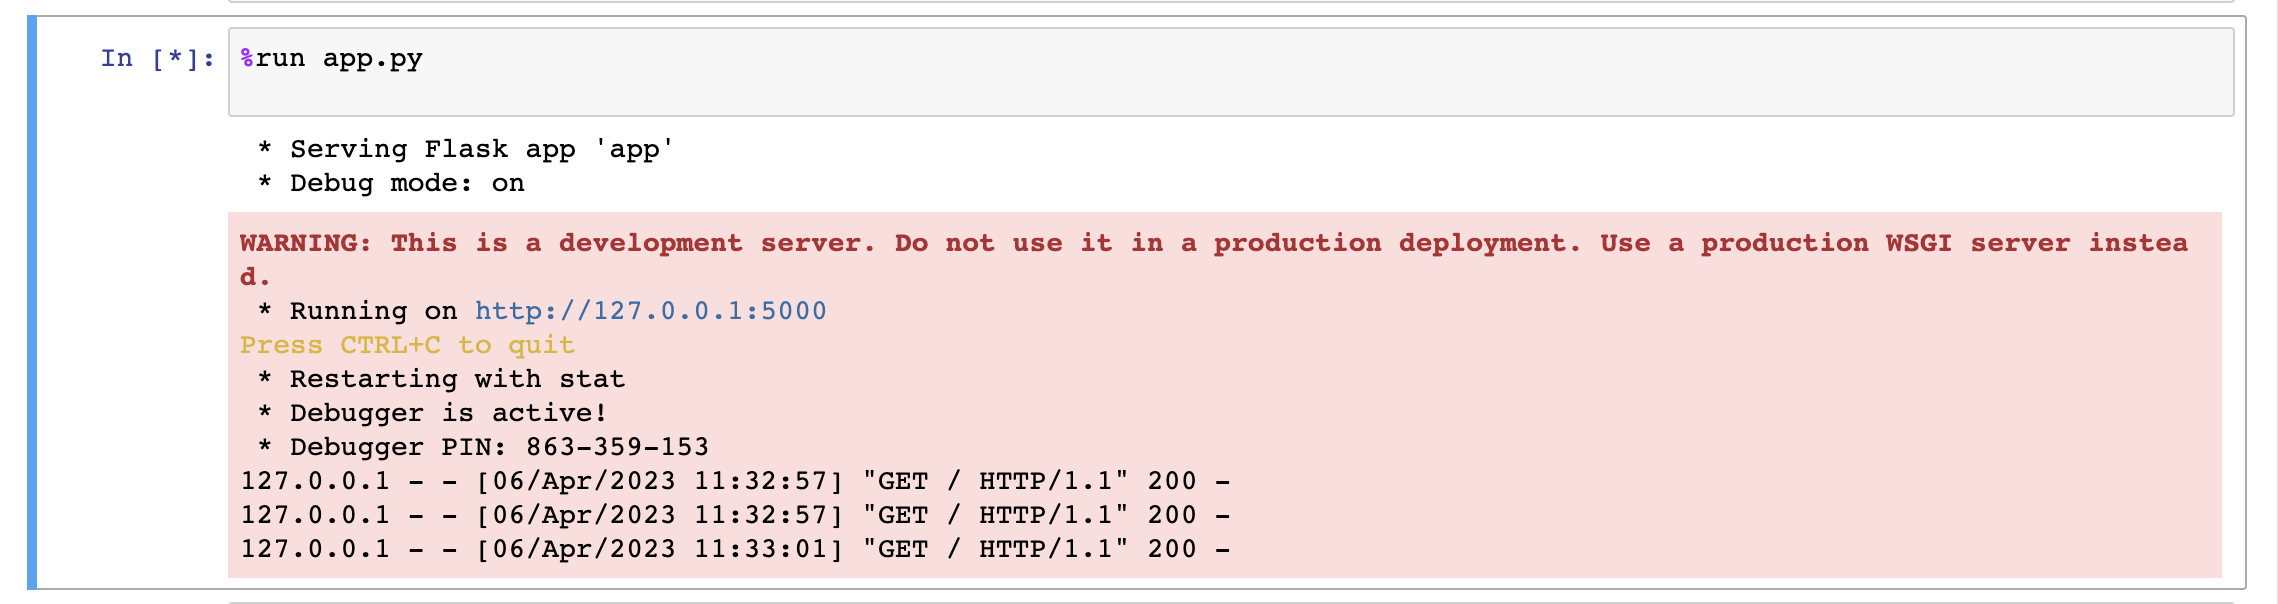
Perfect! let’s just run the last cell of our Jupyter notebook:
You should see an output similar to the one below, which indicates that everything is going according to our expectations😊:
Once you click on the URL link http://127.0.0.1:5000, depending upon your search query, the output will be as follows:
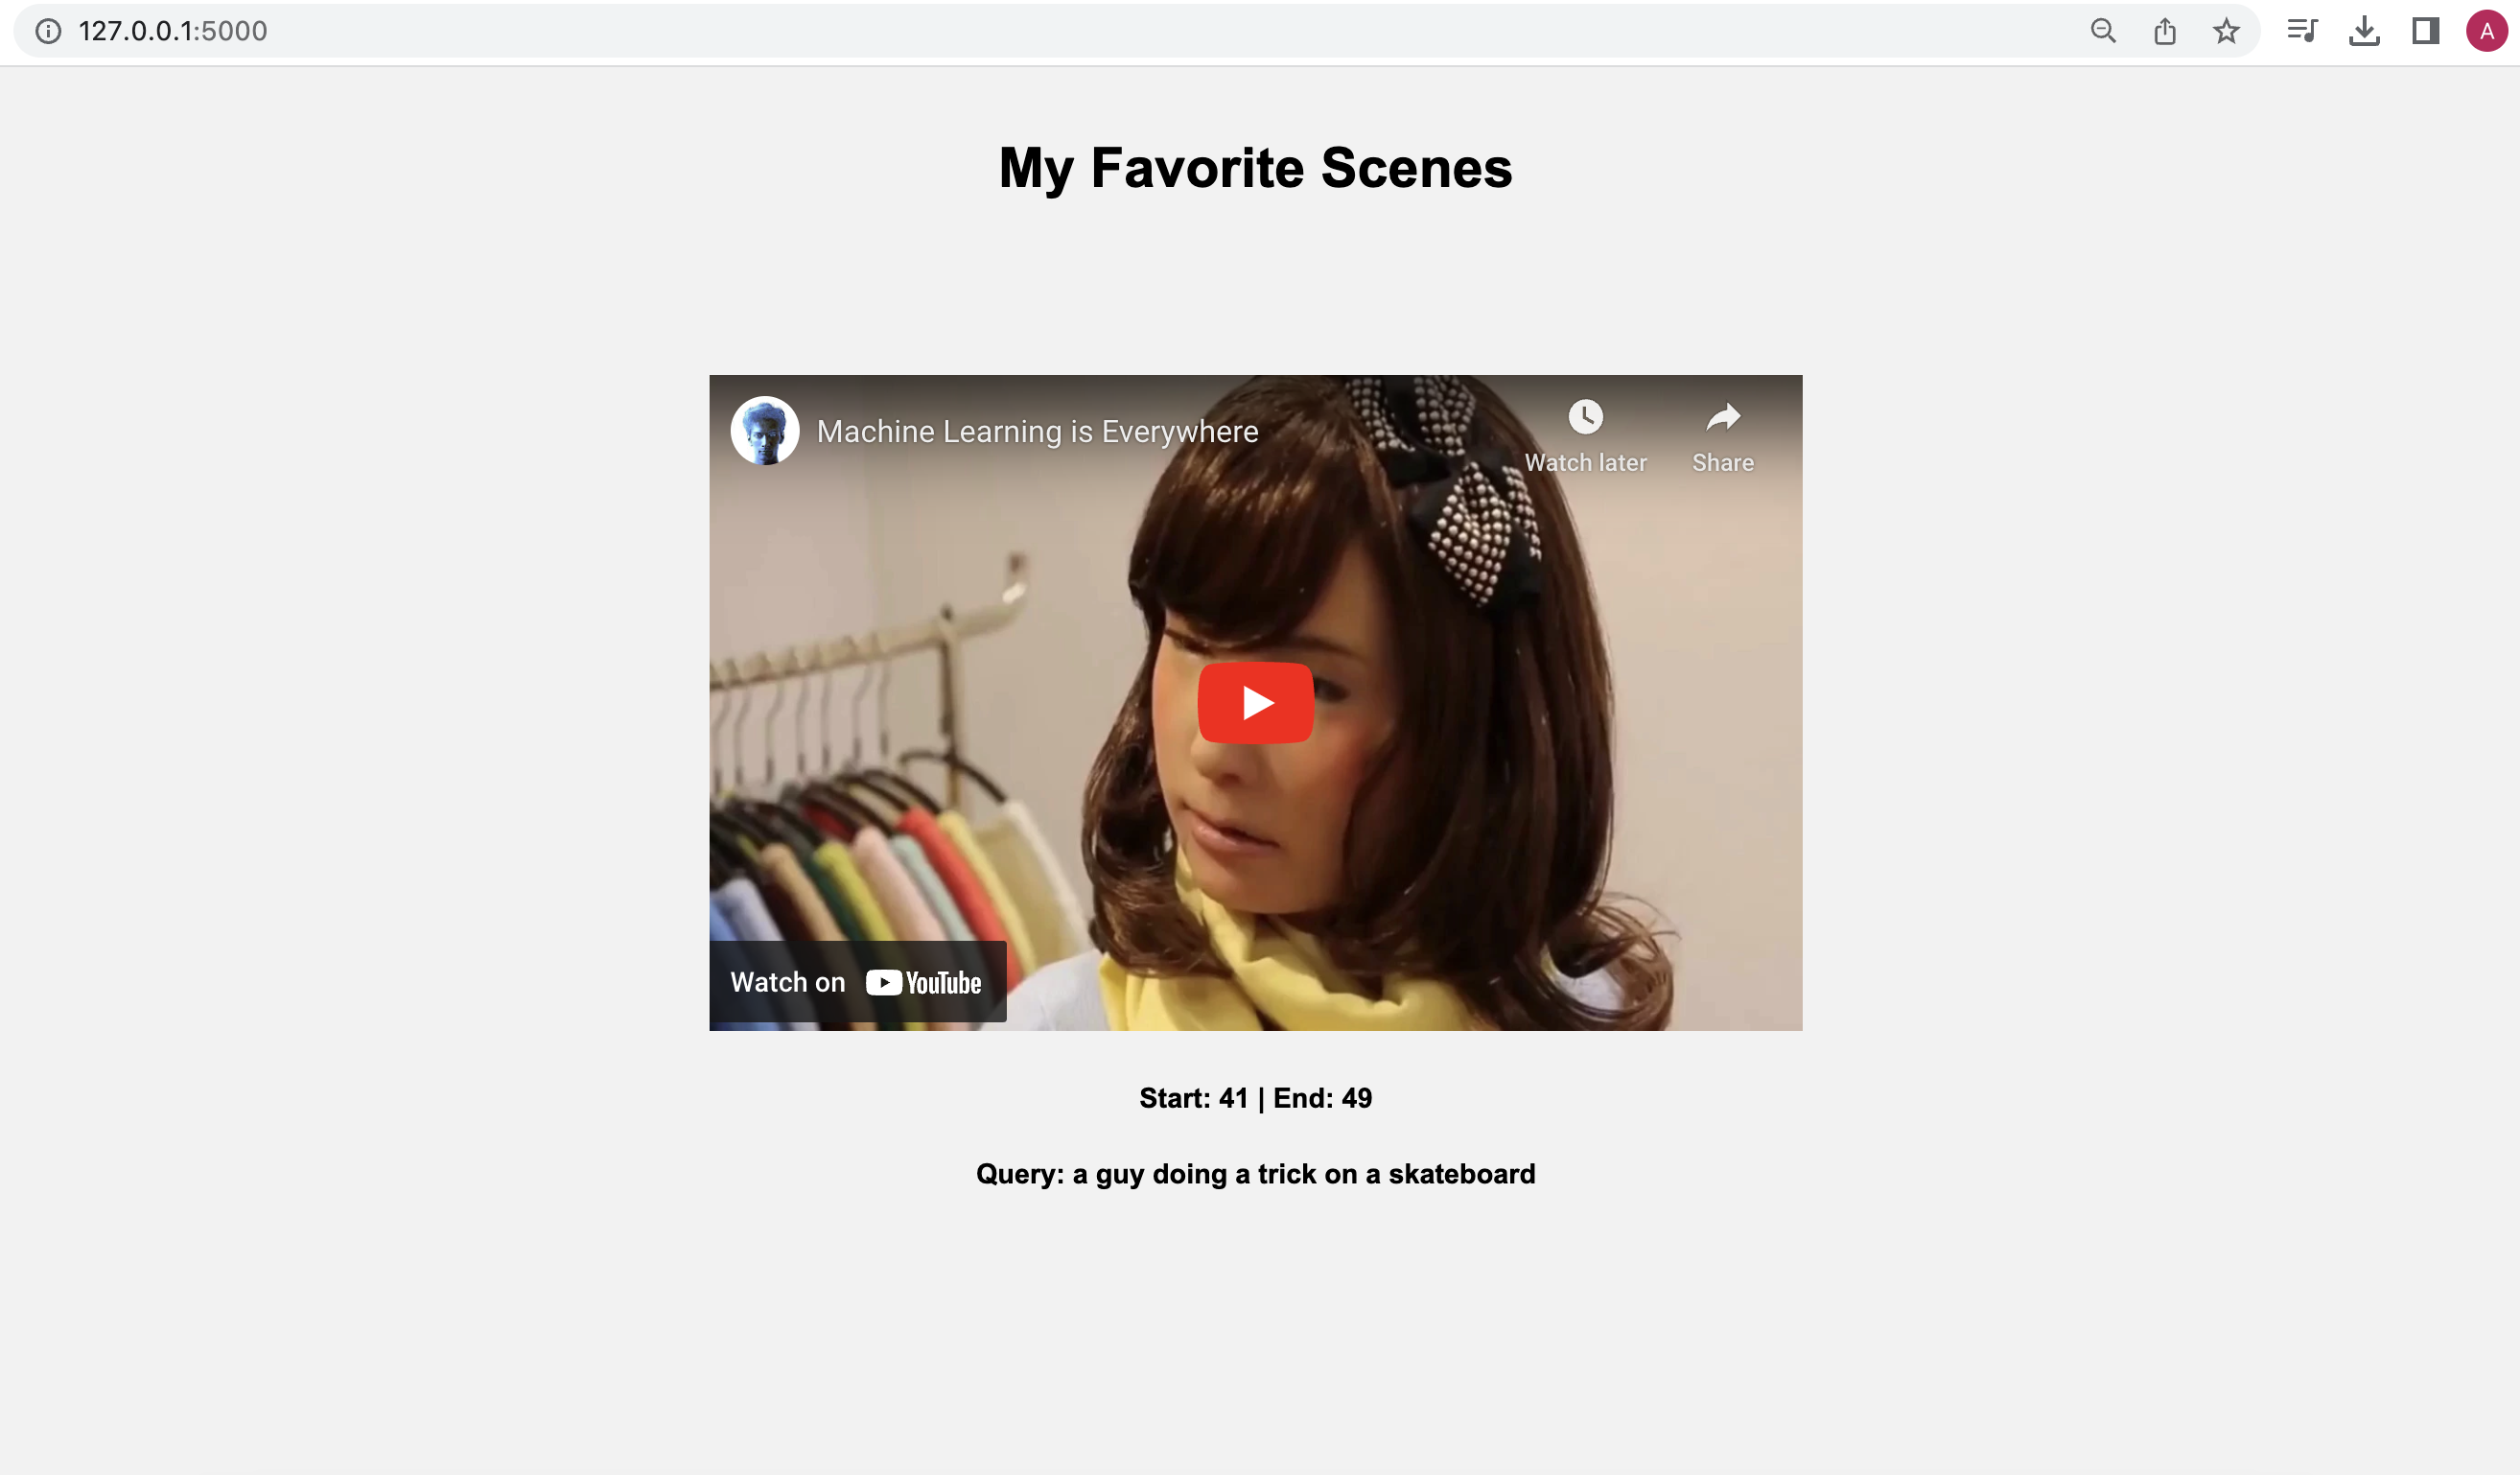
When you play the video, it will adhere to the timestamps we provided, highlighting the specific moments or segments we were interested in finding within the video:
Here's the link to the folder containing the Jupyter Notebook and all the required files necessary to run the tutorial locally on your own computer - https://tinyurl.com/twelvelabs
Fun activities for you to explore:
- Experiment with different combinations of search options - visual, conversation, and text-in-video, and see how the results vary.
- Upload multiple videos and tweak the code accordingly to search across all those videos simultaneously.
- Show your pro developer skills and enhance the code by allowing users to input a query through the index.html page and fetch the results in real-time.
What’s next
In the next post, we'll dive into combining multiple simple queries using a set of operators and searching across a collection of videos with them. Stay tuned for the coming posts!
For now, it a goodbye!
Ankit
Creating awesome Developer Experiences @ Twelve Labs
Oh, and one last thing: don't forget to join our Discord community to connect with fellow multimodal minds who share your interest in multimodal foundation models. It's a great place to exchange ideas, ask questions, and learn from one another!
Happy Hacking!
Generation Examples
Comparison against existing models
Related articles

A beginner guide to video understanding for M&E with MASV and Twelve Labs


"Generate titles and hashtags" app can whip up a snazzy topic, a catchy title, and some trending hashtags for any video you fancy.

A Twelve Labs and MindsDB Tutorial

Our video-language foundation model, Pegasus-1. gets an upgrade!